I have other students who are, let's say, less than motivated; and who have been less-than-motivated for quite a while and are now drowning in the wide gaps in their math knowledge. Also throw in the mix students who work really hard and want to be successful, but just struggle with numbers. Next, add in a dash of students who are new to the country and are just trying to keep their head above water as they are learning a new culture, language, education system and more.
With all of that, I have a class with a wide range of ability, motivation, and knowledge and, as the Brits say, I need to mind the gap (I'm pretty sure that's meant in a very different context, but it sounds great in a British accent in my head, so I'm going with it).
There is a wide gap between my high-achieving and my low achieving students. Between my native speakers and my language learners, between my motivated and my "ehs." I have one class in particular that is all over the place and I have been struggling with how to get a lesson to them...to ALL of them.
So, I tried something that worked...pretty well. I used two pieces of tech for this to work: an app called ShowMe and QR codes.
 If I am going to be out for a personal day or training, to make sure my kids get the lesson, and to make it easy on the sub, I will record the lesson using the Show Me app. I am cheap, so I use the free version of the app which is very limited in what it can do, but it gets the job done. Usually, I will take screen shots or pictures of the worksheet I am doing and will insert it in as a photo so I can model and write on it. Feel free to play around with it and I will work on a post with the ins and outs of Show Me because it has one feature I love. What I love about Show Me is that, when you make a video, you can host it through Show Me. That means, when you create a video, you get a link to that video you can send to others or, as I'll show in this post, attach to a QR code. Why is this great? With other programs, you will have to upload and host your video to another site, like YouTube. That's fine and dandy if you want your voice all out there on the internet, but not me, no way. And also, our school blocks YouTube which means the kids, the people who need the video the most, can't get to it. So, yeah, that won't work.
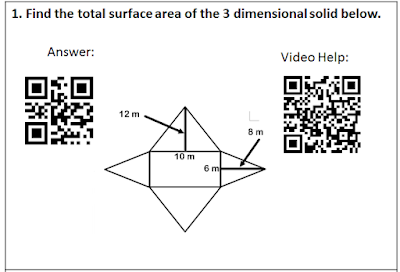
First things first: Make your video. This day's lesson was learning to find the surface area of pyramids from nets. We had already learned how to find the surface area of prisms so it was kind of a review, or at the very least, most students could figure it out without a lot of extra instruction. So, I had 5 questions I wanted them to know how to solve, so I made 5 videos, one for each problem that showed me working them out and the steps to solve. Each video was 1:30 to 2 minutes long. After I made the videos, I emailed the link to myself and created a QR code for each link (if you don't know how to make a QR code, read here).
 |
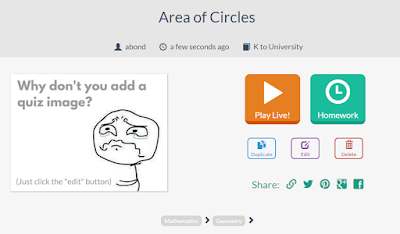
| Choose your video from your dashboard on Show Me. Click the arrow-box thing to share your Show Me video. I usually email it so I have the link for QR codes or putting on class website. |
I then made a text QR code that when scanned would show the correct answer to the problem.
Finally, I put it all together using Powerpoint (I wasn't making a presentation, I just find things are easier to manipulate on Powerpoint instead of Word). I included the text of the question, an image (if needed) and the two QR Codes, one for the answer, one for the video.
I made one card for each question, each a half page and printed them out on color paper (because that's more fun...but certainly not necessary). I printed enough for students to work in partners. After introducing what we were going to do, I gave each pair a set of the 5 cards and an iPad (we only have enough iPads for pairs, at best). Students worked out the problem on their own worksheet instead of writing on the cards (ain't nobody got time to make sets for each class).
When they got their answer they scanned the Answer QR code.
 |
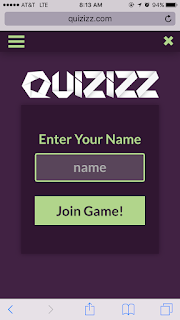
| Scanning the QR Code (Have you tried to screenshot before the reader grabs the code? Not easy) |
 |
| What will appear after scanning "Video Help" QR Code |
If they got it right, they moved on. If their answer was incorrect I asked them to compare their work with their partners, see if they made a calculation error and try and figure out what they did wrong (I like a little self-discovery in math). If they still couldn't figure out where they went wrong, they scanned the code and watched the short video of how to solve.
Guys, this was amazing.
 The more advanced students paired together, solved the problems, then got to business on their homework. They weren't bored and shouting out as we slogged through at a pace that wasn't good for them.
The shy students who are scared to ask for help had the help in their hands. I could literally help 15 groups of kids at one time through the videos.
Students who knew most of the problems didn't have to hear their teacher prattle on about how to solve, instead they got help on exactly what they needed help on.
 And, an added perk is that I had to speak significantly less that day since my "lesson" was on the videos and could just be replayed. Instead, I walked around and corrected errors as I saw them and offered assistance exactly where it was needed instead of a blanket instruction to all. Students could work at their own pace and have their individual needs met, which I find is so hard to get done in a math classroom, especially one as diverse in ability levels as mine.
I hope this was helpful. If you have tried other methods to solve this problem I would love to hear them! Until next time, happy tech-ing!


